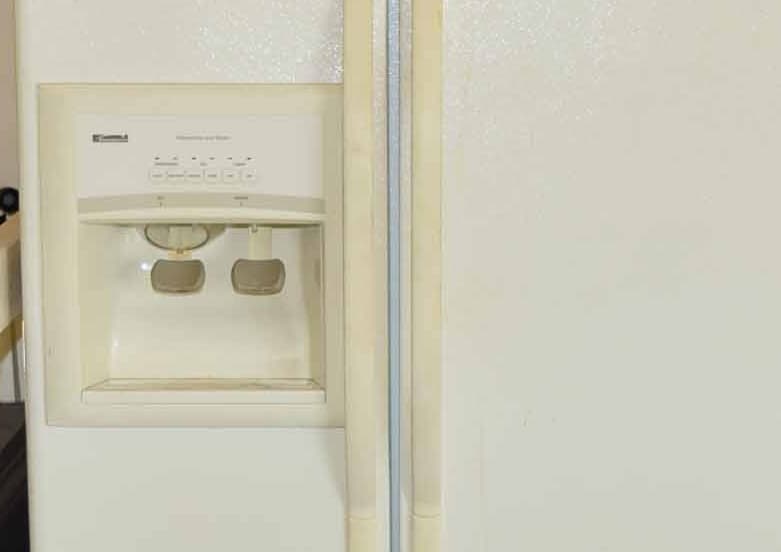
Having an ice maker that stops working can be incredibly frustrating. If you have a Kenmore Coldspot refrigerator with an ice maker that is no longer making ice, there are several things you can try before calling a repair person.
Kenmore Coldspot Ice Maker Not Working

In this article, we will provide a comprehensive guide to troubleshooting a Kenmore Coldspot ice maker that is not working properly.
Common Reasons – Why Kenmore Coldspot Ice Maker Not Working?
Before jumping into the troubleshooting steps, it’s helpful to understand the most common reasons an ice maker can stop working properly:
- The ice maker is turned off – Check the control panel to see if the ice maker is activated. There may be a switch or button allowing you to turn ice on and off.
- Ice jam – Ice can jam up in the ejector arms or chute, preventing the ice maker from producing new ice. This is common if the ice maker suddenly stops working.
- The water inlet valve is defective – This valve supplies water to the ice maker to make new ice. If it fails, no water can enter the ice maker.
- The water supply line is damaged, clogged, or leaking – For the ice maker to work, it must have a steady water supply. Any issues with the supply line can prevent proper ice production.
- The ice maker mold thermostat is defective – This part controls the temperature of the ice mold. If it malfunctions, ice cannot properly form.
- The control module is defective – The control module or circuit board controls the ice-making process. Problems with this part can prevent ice production.
- Low refrigerator coolant levels – The freezer must be cold enough for the ice maker to operate correctly. Low coolant can lead to ice maker issues.
Troubleshoot Kenmore Coldspot Ice Maker Not Working Issue:
With those common problems in mind, follow these troubleshooting steps:
- Step 1: Ensure the ice maker is turned on – Check your owner’s manual for instructions on accessing ice maker settings. Look for an on/off switch or button on the control panel. Confirm that ice-making is activated.
- Step 2: Check for ice jams – Inspect the ice maker unit and ejector arms for any jammed ice. Also, check the chute and filter housing. Use a plastic utensil to clear any jammed ice.
- Step 3: Test the water inlet valve – Turn off the water supply to your refrigerator. Remove the water line from the valve and place it in a bucket. Turn the water back on to see if the valve lets through water. Replace the valve if no water comes through.
- Step 4: Examine the water supply line – Unplug the refrigerator and shut off the water supply. Disconnect the water line from the back of the unit. Check for cracks and leaks. Clean out any dirt or deposits. Replace any damaged sections.
- Step 5: Check the ice maker mold thermostat – Unplug the refrigerator again and locate the thermostat using your owner’s manual. Test it for continuity using a multimeter. If faulty, replace the thermostat.
- Step 6: Replace the control module – If no other repairs have resolved the issue, replace the ice maker control module. This may require assistance from an appliance repair technician.
- Step 7: Recharge the refrigerant – Low coolant levels can prevent ice production. A technician may need to access the sealed system to check and recharge the refrigerant if low.
Additional Troubleshooting Tips to Fix Kenmore Coldspot Ice Maker:
Here are some other helpful tips for troubleshooting a Kenmore Coldspot ice maker:
- Clean the ice mold assembly periodically using a mild detergent. This prevents mineral deposits from disrupting ice formation.
- Check the water filter to see if it needs replacing. A clogged filter can reduce water flow.
- Allow sufficient time for ice to be made after first installing the ice maker, or if the supply has been disrupted. It takes up to 48 hours to begin ice production.
- Ensure the freezer temperature is around 0°F. The cold temperature is needed for the water to freeze properly.
- Listen for any unusual sounds when the ice maker is running. Buzzing or clicking could indicate a jam, faulty motor, or other issue.
- If the ice maker makes only partial cubes, check the water-fill tube to ensure it’s correctly aligned over the ice mold.
- Don’t continue using the ice maker if it’s leaking water. Determine the source of the leak before further use.
When to Call a Repair Technician?
If you’ve worked through all of the troubleshooting steps and the ice maker still does not work properly, it’s probably time to call in a professional repair technician. A technician can diagnose issues that may not be obvious to the average homeowner.
They can also safely access the sealed refrigeration system if low refrigerant is suspected. The cost of repairs will vary depending on the specific issue and any parts that need replacement.
Checking the Water Fill Tube:
One common issue that can prevent ice production is if the water fill tube becomes misaligned or obstructed. Here is a more detailed overview of examining this component:
- Locate the fill tube at the rear of the ice maker assembly. This is a small diameter tube that delivers water into the ice mold.
- Remove any debris, ice, or frost that may be blocking the end of the tube. This can prevent water from entering the ice mold.
- Check that the fill tube is properly aligned over the ice mold. If it has moved off-center, use care to gently bend it back into the correct centered position.
- Make sure the tube is fully inserted into the ice mold overflow channel. If the tube is not fully inserted, not enough water may enter the ice mold.
- Inspect the tube for cracks, damage, or leaks. A damaged fill tube should be replaced. Make note of the routing when removing so the new tube can be aligned correctly.
- Remove the ice maker to inspect the fill tube further and clear any obstructions. Reinstall ensuring the tube aligns over the ice mold channel.
Taking the time to carefully realign and inspect the fill tube can allow proper water flow into the ice mold and resolve low ice production issues.
Testing Components with a Multimeter:
Using a digital multimeter to test components is an important troubleshooting skill. Here are some tips on using this tool:
- Set the multimeter to the appropriate setting – resistance, voltage, or continuity test mode – for the part being tested.
- Remove or disconnect the component you want to test. For example, disconnect the thermostat wires from the terminals.
- Touch the multimeter probes to the appropriate pins or terminals on the part.
- Compare the multimeter reading to manufacturer specifications. For example, a thermostat should show continuity.
- Repeat tests several times to verify results, ensuring proper probe contact.
- For the control module, touch probes to input and output terminals to check for proper voltages.
- If readings are not within specifications, the component is likely defective and needs replacement.
Using a multimeter can definitively test whether parts like the thermostat, valve, control module, and heater are functioning properly or need to be replaced.
Refrigerant System Service
If low refrigerant levels are suspected, it is best to call an experienced appliance repair technician to service the sealed refrigerant system. This includes:
- Recovering any leftover refrigerant in the lines. This requires certified equipment.
- Locating and repairing leaks in the refrigerant lines. This may involve replacing lines if a leak cannot be repaired.
- Pulling a vacuum on the system to clear any moisture. This requires a vacuum pump tool.
- Recharging the system with the specified type and amount of refrigerant. The charge is weighed as the refrigerant is added.
- Testing for leaks to ensure refrigerant integrity before putting the appliance back into service. A leak would require repeating the charging process.
The refrigerant system contains chemicals under high pressure and should only be serviced by qualified HVAC technicians. Proper handling of refrigerants is required per EPA rules.
When to Replace the Ice Maker?
In some cases, you may need to replace the entire ice maker assembly:
- If the mold assembly is badly warped or corroded.
- When bearing components like augers and drive shafts are seized up.
- When the housing and mold show excessive mineral deposits.
- If previous repairs would be more labor intensive than replacing the unit.
- When specific replacement parts are no longer available.
Carefully inspect the condition of the overall ice maker when troubleshooting to determine if repairs are worth pursuing or if replacement is the better option.
Be methodical when troubleshooting a Kenmore Coldspot ice maker failure. Start with easier DIY repairs like clearing ice jams and replacing fill tubes or thermostats.
Call in a professional for suspected refrigerant issues or complex component replacements. Consider a replacement if the ice maker housing shows excessive wear and mineral buildup.
Persistence combined with the proper repair procedures will ultimately get your ice maker working again.
The Ice-Making Process:
To better troubleshoot issues, it helps to understand the ice-making process:
- The mold thermostat senses the ice mold temperature is warm enough to start making ice. It signals the control module.
- The control module activates the water inlet fill valve to fill the ice mold with water. The fill tube directs water to the mold.
- After the mold fills, the module turns off the water inlet valve and energizes the heater. The heater warms the thermostat.
- As the water freezes, the thermostat cools back down, signaling the control module.
- The control module then triggers the ejector heaters to warm and loosen the ice cubes.
- Next, the ejector gears are turned by the motor to lift and propel ice cubes out of the mold.
- The module deactivates the ejector heaters and motor once ice dispensing is complete.
- The thermostat again signals the module when the mold warms up, and the cycle repeats to fill the mold with water.
Knowing this sequence can help pinpoint where in the process a failure is occurring.
Important Safety Precautions:
Use care when troubleshooting an ice maker to avoid hazards:
- Turn off the water supply and unplug the refrigerator before repairs to avoid electric shock and water leaks.
- Use caution when handling sharp metal components like ejector blades or the ice cutter grid.
- Wear eye protection and gloves when cleaning mold deposits or dealing with refrigerants.
- Use caution when handling high-voltage circuit boards and thermostat wiring.
- Ensure hands and tools are dry before testing electrical components. Electricity and water don’t mix!
- Refer to the user manual for proper procedures when removing and handling refrigerant lines.
- Double-check that all water and refrigerant lines are intact, tightened properly, and free of leaks before putting the unit back into service.
Following basic safety measures will prevent injury and avoid damage to the appliance when troubleshooting ice maker issues.
FAQs on Kenmore Coldspot Ice Maker Not Working:
- Why does my ice maker only make a few cubes before stopping?
This often indicates a low water supply issue. Check that the water inlet valve is functioning properly and that the water supply line has good water pressure and no blockages.
- Why are my ice cubes very small?
Small cubes are typically caused by low water volume entering the ice mold. Make sure the fill tube is aligned properly over the mold and free of obstructions.
- Why are cubes cloudy or white?
Cloudy or soft cubes can be caused by low freezer temperatures. Make sure the freezer temp is around 0°F.
- Why does the ice maker seem loud when operating?
Unusual noises like buzzing or grinding could indicate a jam, blocked fan, or worn drive components like the motor or auger gears.
- How can I remove a stuck ice maker assembly?
To remove an ice maker that is frozen solid or stuck, use a hair dryer to gently heat the mounting brackets and loosen the ice bonds. Take care not to damage plastic parts.
- Where is the control module located?
The control module or circuit board is typically located on the back or side wall of the ice maker housing or freezer compartment. Check your model’s service manual for the exact location.
- How do I clean mineral deposits from the ice mold?
Mix a solution of vinegar and water and scrub deposits off using a soft brush or plastic scraper. Never use sharp metal tools on the ice mold.
- What causes black dots or specs in the ice cubes?
This is typically caused by dirt or other debris entering the ice maker. Check that the water filters are clean. Keep the freezer compartment clean.
- Why won’t the ejector blades push out the ice?
Dirty or damaged ejector blades can prevent ice from properly ejecting. Remove any stuck ice then clean and inspect the blades for damage. Replace if necessary.
- Can I convert my ice maker from plastic cubes to clear cubes?
Yes, you can install an aftermarket clear ice maker kit. However, make sure it is specifically designed for your Kenmore Coldspot model. The kit should include a new mold and ejector components.
Also Check:
- Hayward Salt Cell T15 Not Working
- Voltrx Shaker Not Working
- Whirlpool Refrigerator WRX986SIHZ00 LED Lights Not Working
- Voxi SIM Not Working
Conclusion:
Having an ice maker stop working suddenly can certainly be disruptive and inconvenient. However, there are several DIY troubleshooting tips you can try to get your Kenmore Coldspot model working again before calling in a professional.
The problem often comes down to a shut-off unit, ice jam, water supply problem, thermostat failure, or control board defect.
Persistence and methodically working through the repair steps can often yield positive results. If issues persist after trying these troubleshooting suggestions, then it’s likely time to bring in an appliance repair technician for diagnosis and servicing.
With the right guidance and replacement parts when needed, your ice maker can be restored and provide reliable service once more.


