When you buy baseboard at the store, it can be very long, sometimes 16 feet. They are long because it looks good to have one piece on a whole wall.
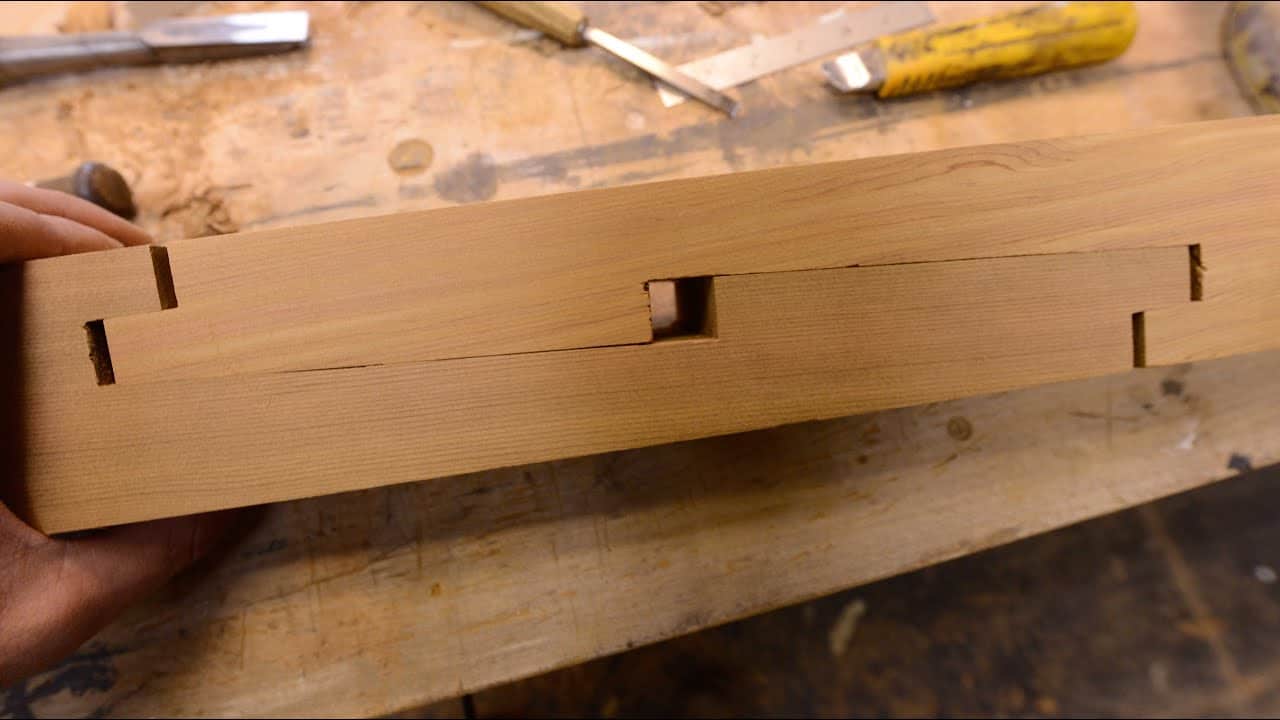
But if the wall is longer than the baseboard, you need to join two pieces. The best way to join them is with a scarf joint, where the ends are cut at angles and fit together.
How to Join Baseboard Moldings With Scarf Joints?

Scarf Joints vs. Butt Joints
What they are:
- Scarf Joint: It’s like when you overlap the ends of two pencils so they fit together at an angle.
- Butt Joint: It’s like pushing the flat ends of two blocks together.
How they look:
- Scarf Joint: The ends are slanted and overlap.
- Butt Joint: The ends are flat and just touch.
Strength:
- Scarf Joint: Stronger. Because they overlap, they hold together better. You can even add glue for extra strength.
- Butt Joint: Not as strong. The flat ends might not stick together well.
Changes in wood:
- Scarf Joint: If wood changes size (like from wet to dry), the joint still looks good. No big gaps.
- Butt Joint: If the wood changes, a gap might appear. Not so nice to look at.
When to use:
- Scarf Joint: Best for things like baseboards. Makes them look and stay nice.
- Butt Joint: Easier to do but not as good for many jobs.
In short, scarf joints overlap and are stronger. Butt joints are just two flat ends touching and can be weaker.
Tools for Making Scarf Joints:
Cutting Angles for a Scarf Joint:
- Best tool: A power miter saw.
- No power saw? Use a miter box with a hand saw.
- Why? You need sharp 45-degree cuts. These are hard without these tools.
Nailing Baseboards:
- The best tool: A nail gun (either using electricity or air pressure).
- Why? Using a hammer can shake the wood and move it. A nail gun quickly puts the nail in before the wood can move.
But, using a Hammer and Nails:
Still works!
Tips:
- Hold the wood tightly in place.
- Make small starter holes for the nails. This helps the nails go in easily.
- After nailing, push the nail a bit deeper into the wood to hide it.
In short, special tools make the job easier and better. But with care, even basic tools can work well.
What You’ll Need?
Equipment / Tools
- Tape measure
- Pencil
- Power miter saw, or miter box and handsaw
- Nail gun, or hammer and nail set
- Wood glue
Materials
- Baseboard trim
Instructions – How to Join Baseboard Moldings With Scarf Joints?
-
Plan the Joint Location:
Put the end of the first board over a wall beam, if you can. This lets you nail into the beam, making it stronger. If you can’t do that, it’s okay. Just nail the board into the bottom part of the wall.
-
Cut and Install the First Board
Cut the first baseboard’s end at a 45-degree angle. The sharp point should face the room and touch the wall. Put the board on the wall and nail it. But, don’t nail near the angled end; this lets you move the board if needed.
Remember: For the corner part of the baseboard, you have two ways:
- Cut it straight and fit it with a special joint.
- Angle cut both boards at the corner.
-
Cut and Test-Fit the Second Board
Cut the second baseboard at a 45-degree angle too. This time, the slant should face the wall. This makes it fit over the first board’s angle. Put the second board up and check if they fit well. If the second board is too big, cut a little off and try again.
-
Glue and Nail the Boards
Put some wood glue on the slanted side of the second board. Join the two boards so they look good together. Nail them at the joint, through both pieces into the wall’s beam if you can. If you’re using a hammer, make small starter holes before nailing.
- Nail Rest of Second Board
Nail the rest of the second board in place. Then, nail the first board, but stop about 16 inches from where they join.
Remember: You can use this joining method for other moldings too, like ones on ceilings or middle wall trims.
More For You:
Conclusion:
So now you know How to Join Baseboard Moldings With Scarf Joints and if you still have any queries or feedback then you can drop them in the comment section below.


